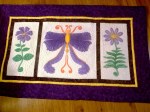
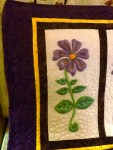
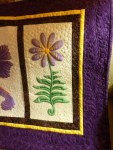
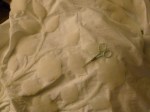
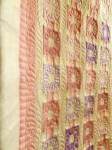
I’ve always liked painting and when I first saw some of Irena Bluhm’s quilts, I was fascinated with the process. While in Milwaukee at the Showcase last August, I picked up a sample dragonfly from her and talked with her about the process. I purchased some Prismacolor pencils, some brushes and a bottle of Delta Ceramcoat textile medium. I found that the textile medium really blended the color and pushed it around some. I lid how the dragonfly turned out, but didn’t want it to be just an orphan block, so I created two flower panels and added trapunto to them. I also cut away the batting from around the dragonfly block to give it trapunto also. I then arranged them together with purple and yellow fabric. I like how it turned out – now to find a place to display it! I think I’ll try this again, I may want to try some different paint mediums though.
Those are the locations two of my quilts are going!!! Winter Garden was juried into MQX East in Rhode Island – a national quilt show in April. AND Sunflower Stars was juried into the Paducah Quilt Show, also in April! OMG! REALLY?! Seriously!? What an honor to be accepted at both places. My quilts will compete against some of the BEST in the world! I have no illusions of winning a ribbon, but can you imagine how many people will see my quilts!
After April is finished, Winter Garden will go on to MQS in Overland Park, Kansas in May. I’m planning on entering it in some other shows later this year also. I just got the appraisal on it today, also. THANK YOU Halleye Bone! For my appraisal and for showing me around St. Louis to some fabulous fabric shops.
Well, almost done. I still have to trim, soak and bind. I’d like to block it, but I don’t have the room to do that. Overall, I LOVE LOVE LOVE it. The problems I had with this quilt were plenty – my hopping foot broke (thank goodness for spares), my bobbin case was faulty, my bobbins were out of round, and my needle plate needed sanding. So it wasn’t just one thing that was wrong, it was several. I figured out everything by the time I was 2/3 of the way through it. I ripped out one section because of bad tension on the back, but I’m hoping that washing the quilt will help hide the rest of the tension troubles.
Ok, I need a name. Garden Party? Winter Garden? White Garden? Hmmmm. Need to think about it a bit more. Now, to get the binding ready so it can soak with the rest of the quilt and then hopefully I will have settled on a name so I can get the label done.
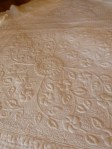
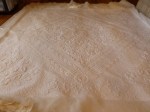
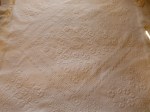
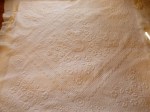
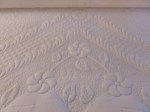
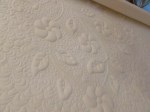
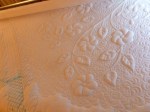
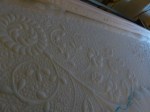
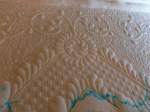
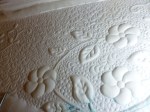
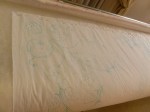
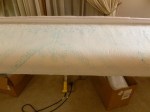
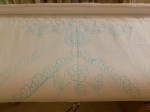
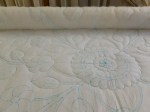
I’m making progress on the wholecloth quilt. Here are a few more pics. I’m excited about this quilt and extremely disappointed at the same time. The top looks great! The back, however, I’ve been fighting tension problems the whole time. I’ve changed bobbin cases 4 times, retimed my machine, and have done every single thing I can think of. I just can’t keep the tension correct at all. I actually ripped out a whole section and redid it, but now, I’m just resigning myself to a back that is going to be disappointing to say the least. The only thing I think is the problem is that I’m using Bottom Line on top and in the bobbin also. My machine seems to work better if the top thread is a thicker thread than the bobbin thread.
Anyway, here are some pics. I can’t wait to get it done and soak all the blue marker and dissolvable thread away.
I’m making progress on my wholecloth quilt. I loaded it this week and have managed to complete nearly one pass. This shows you what it looks like after I have spritzed it with water to remove the blue marker (you can see where the marker ran in a couple of places). You can also see where the dissolvable thread is on the design where I outlined the trapunto. When this is done, I’ll soak it to remove all the blue marker and all the dissolvable thread.
I decided to do pebbles and a sort of clamshell filler in the background. Yes, I’m totally insane! I’m liking my checkerboard quilting in the center border. At this rate, it will take me at least two weeks to finish. I have a baby quilt to load, but was stumped on the design, so I decided to load this and get it done. I plan on entering it into the Decatur Quilt Fest in March. I’ll post more pics as I go.
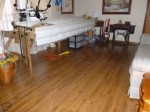
Yeah! I can finally get my quilt frame back up. The day after Christmas, I took down my quilting frame, emptied the room of everything – moving most of the furniture to the barn and the rest here and there in the rest of the house. We then tore up the carpet that was in that room and the dining room. I purchased laminate flooring at Sams Club (25 boxes total) and we started laying the floor shortly before New Years. We made good headway on the project. It only took 2 days to install the laminate. However, it took a bit longer to install the trim. I not only wanted to install baseboard trim, I also wanted to replace the doorway trim. All of that trim needed to be stained (2 coats) and finished. But oh my – it was SO worth it. The only thing I messed up on was purchasing ALL of the transition pieces (approximately $100 worth) and staining them all before I tried to install them. I was so unhappy with them, that I wound up buying a different type of transition at a replacement cost of just under $100. Then of course I had to stain them again also. All in all – I love the new look. It is very durable and easy to clean. The flooring came with a life-time warranty, so hopefully this will be the last we have to replace the flooring in those two rooms.
As soon as the frame was put back up, I had a quilt top dropped off (thanks Elaine!). So, I have a wholecloth ready to put on and Elaine’s baby quilt to do. I have another queen-sized quilt coming from a customer and another quilt I’m working on myself.
I have more shopping to do too! Every project leads to another one it seems. I need a couple of rugs for the front room. One runner in front of my frame and one area rug underneath the two club chairs. The white rug that is there right now belongs in another room. I’m also looking to get a couple of kitchen cabinets with a countertop across them or a desk for Nick’s room. And, I’m thinking about restoring my kitchen countertops. And oh yes, the flooring in both bathrooms will need replacing. And so on and so on. 🙂
In August, 2011, I attended a wholecloth design class taught by Karen McTavish at the Milwaukee Machine Quilters Showcase. During the class, we talked about the basics of designing a wholecloth. The points I feel are most important are these:
1. Choose your design element and stick with that for consistency.
2. Make sure your top is square and mark the top into quarters on the diagonal. To do this properly, you need to make sure you have a long enough straight edge ruler or something similar.
3. Take your time and think through the process, but don’t overthink it!!
4. Don’t be afraid to challenge yourself. (probably the most important step)
At the end of the class, I had designed a 74″ square quilt top. I still had some marking to finish at home, but the overall design was complete. While not every wholecloth has to have trapunto, I feel it adds another element to the design and takes the quilt into another level. My Sunflower Stars quilt was my first attempt at trapunto and I believe was the reason why it won so many awards. This one will be my 2nd quilt with trapunto and I have a third original design quilt in the works that will also have trapunto.
To trapunto on a longarm machine , you pin batting to the underside of the quilt top, making sure that the batting covers all of your design element that will be trapuntoed. If the batting is pinned onto the quilt top in this manner, you will attach the quilt top to the leaders normally used for the backing.
Alternatively, you can layer one whole batting under your quilt top if there is a large amount of trapunto. This is what I did in this quilt. I attached one double sized Quilters Dream wool (you can use polyester, also) to the leaders and pinned the quilt top on top of it.
You then load a water-soluble thread (such as Superior Vanish Extra) on top and any thin thread in the bobbin. Make sure the thread matches the quilt top or the batting (I used white Bottom Line). Run the Vanish a bit loose. Don’t worry about perfect stitching; your only concern is making sure you hold the batting to the quilt top. Then stitch around the design that will be trapuntoed. One thing to mention is that you do not have to stitch out the entire design – just stitch around the outer edges of the motif or design that will be trapuntoed.
When you are done, you remove the quilt top and batting from the frame, and cut away the batting from the bottom of the quilt. Leave only the batting that will be used in the trapunto design. Be careful to not snip the quilt top; but don’t freak out if you do (you most likely will have a snip or two that you will hide during the quilting process). After you have completed this step, you will load the quilt as usual to the frame and quilt as desired. After the quilt is finished, you soak the quilt in cool water to dissolve the water soluble thread, leaving only your quilting design to show.
Below are some pics of the progress so far. I’ve got a couple more days of cutaway to do and then I’ll be able to load onto the frame to quilt.
Filtec sent some lucky quilters some new thread to test out recently. Their claim was that this new thread was unbreakable! While I did manage to break it once by running it at high speed from right to left (which will always break thread on my machine), it never broke under any other condition. And believe me, I put it through the paces!
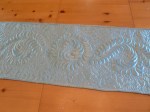
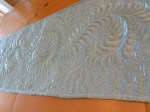
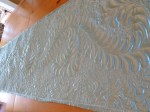
First, I tried using it on some crepe backed satin I had in my stash. I cut a piece big enough to fit on my table as a runner and used it on both the top and the bottom of the quilt sandwich with the satin side up on top and the crepe side on bottom. I used some leftover Quilters Dream wool as the batting. I have to say I absolutely loved how this thread behaved. I used it in both the top and the bobbin and it stitched wonderfully. While it came to me on a spool marked Glide, it did not resemble the usual Glide thread. It’s sheen was more subdued – resembling the sheen you’d get with some rayon thread. I use Filtec’s Premo Soft thread a lot because it resembles cotton and has no sheen. I use Glide on those quilts where I want the quilting to shine or on modern contemporary quilts. With this new brand of thread, it falls somewhere in between those two in terms of its sheen.
As a second test, I used it on a baby quilt where I simply stitched some wavy lines from left to right. I would at times almost outrun the machine with how fast I was sewing, and that thread never broke once! Again, I absolutely LOVE it. I can’t wait for it to be officially released. Thanks Filtec!
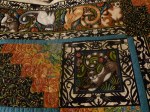
I just took this cute cat quilt off the frame. What a cute quilt! I treated the cats as applique and stitched around them. In the black and white sashing, I quilted swirls. In the log cabin blocks, I did swirly feathers, and stitched in the ditch between the seams. I used So Fine black thread in the bobbin and Isacord black thread on top. I went back and forth over the color of thread to use and wound up with my first choice – black. I used Legacy 80/20 blend batting.
Next up is a small baby quilt with a minky backing and then I’ll be working on my quilts!
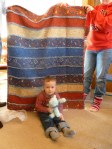
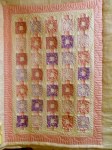
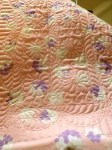
I’m not sure what this pattern is, so I’m calling it the baby quilt from Canada. This is such a cute little quilt. Made from flannel, I love the colors. It looks so soft and cuddly. On this quilt, I used wool as the batting. With baby quilts, I feel like you need to use a natural textile, like wool or cotton. Burn tests have shown that wool and flame retardant battings like Quilters Dream Angel are much safter than a poly batting or a poly blend batting. In this case, we wanted a puffiness to the quilt, so I used Quilters Dream wool. I really love their wool batting. It’s washable in cold water only (warm will make it shrink) and dry in a cool dryer.
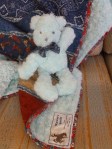
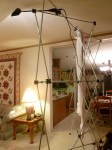
I used lots of feathers in this one and you just want to run your hand across the top – it’s SO cuddly! The last picture shown is a new setup I have for taking quilt pictures. I’m still tweaking it, but so far it works pretty well! Best of all, it was free! I repurposed a trade show exhibit frame that our company no longer was using and it works pretty well for taking pictures. It collapses down and fits into a small bag that I can store when I’m not needing it. One of these days, I’ll have a big studio that I can keep it up all the time!