
In August, 2011, I attended a wholecloth design class taught by Karen McTavish at the Milwaukee Machine Quilters Showcase. During the class, we talked about the basics of designing a wholecloth. The points I feel are most important are these:
1. Choose your design element and stick with that for consistency.
2. Make sure your top is square and mark the top into quarters on the diagonal. To do this properly, you need to make sure you have a long enough straight edge ruler or something similar.
3. Take your time and think through the process, but don’t overthink it!!
4. Don’t be afraid to challenge yourself. (probably the most important step)
At the end of the class, I had designed a 74″ square quilt top. I still had some marking to finish at home, but the overall design was complete. While not every wholecloth has to have trapunto, I feel it adds another element to the design and takes the quilt into another level. My Sunflower Stars quilt was my first attempt at trapunto and I believe was the reason why it won so many awards. This one will be my 2nd quilt with trapunto and I have a third original design quilt in the works that will also have trapunto.
To trapunto on a longarm machine , you pin batting to the underside of the quilt top, making sure that the batting covers all of your design element that will be trapuntoed. If the batting is pinned onto the quilt top in this manner, you will attach the quilt top to the leaders normally used for the backing.
Alternatively, you can layer one whole batting under your quilt top if there is a large amount of trapunto. This is what I did in this quilt. I attached one double sized Quilters Dream wool (you can use polyester, also) to the leaders and pinned the quilt top on top of it.
You then load a water-soluble thread (such as Superior Vanish Extra) on top and any thin thread in the bobbin. Make sure the thread matches the quilt top or the batting (I used white Bottom Line). Run the Vanish a bit loose. Don’t worry about perfect stitching; your only concern is making sure you hold the batting to the quilt top. Then stitch around the design that will be trapuntoed. One thing to mention is that you do not have to stitch out the entire design – just stitch around the outer edges of the motif or design that will be trapuntoed.
When you are done, you remove the quilt top and batting from the frame, and cut away the batting from the bottom of the quilt. Leave only the batting that will be used in the trapunto design. Be careful to not snip the quilt top; but don’t freak out if you do (you most likely will have a snip or two that you will hide during the quilting process). After you have completed this step, you will load the quilt as usual to the frame and quilt as desired. After the quilt is finished, you soak the quilt in cool water to dissolve the water soluble thread, leaving only your quilting design to show.
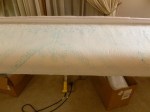
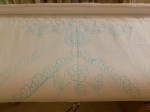
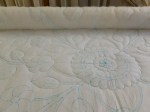
Below are some pics of the progress so far. I’ve got a couple more days of cutaway to do and then I’ll be able to load onto the frame to quilt.
-
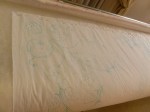
- Wholeloth loaded on frame
-
- Wholeloth loaded on frame
-
- Wholeloth loaded on frame
-
- Wholeloth loaded on frame
-
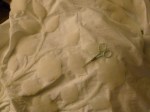
- Cutting away the batting

What type of batting/wadding do you use for the Trapunto?? and do you use the same for the “completion” of the quilting?? Love the design you’ve done, this will look amazing.
Thanks! I am using Quilters Dream wool batting for both the trapunto and the final quilt batting. I used that combination in my Sunflower Stars quilt and I loved the feel of it when it was done. If you wanted to use poly, then go for a high loft poly for the trapunto sections. Karen McTavish uses poly batting from The Batty Lady – http://battylady.com/high-loft-trapunto-batting-yard-p-258.html
I am so glad you showed me how you do this, both in person at my house and now on your blog tutorial! I hope to one day do such a project.